Wednesday, February 13, 2013

Early springtime?

Some photos to show you what's been doin' around here :)

First, some snaps of the pretty backyard, courtesy of Nemo.  I feel bad for LI and Boston, but happy that NJ wasn't so badly hit.  We had about 5-6", and it was fast-melting.  Not too shabby as far as winter goes.


In fact, our snowdrops are already out.  These are so pretty, each one like a delicate little pearl...Yesterday I plucked a few to press, but one came out with a bulb attached, so I stuck it in some potting soil and it opened today!  Must learn more about snowdrops to see if they can be raised indoors, too.  A pot of these by my desk would be lovely, but we'll see what happens.


Yesterday saw a lot of nature walking around the back yard.  I gathered some tiny treasures to press.  The moss would be lovely dried and set in some resin for delicate earrings.


Once more I'm at my bead board!  I'm working on a new set called "Skully Cat", because I can! Some of my bits and bobbins are still in storage, but I've done remarkably well keeping track of all the beads and shinies.  Finally, this morning, something came together, and here it is:


Those colors are waking me up!  Every once in a while, I need to make something with a sense of humor.


The new workspace isn't nearly that bold, though.  I've been granted use of a sunporch, and I've made quite the little nest back there with the plants.  It's a narrow space, but that'll just force me to keep it cleaner :)


It does help my spirits to see familiar things again, like Mr. Cat Skull, and some beautiful abandoned wasp nests:

And our wedding cake toppers, from New Orleans, gifted by my maid of honor :)  The geode was our version of a unity candle.  Instead of lighting, we took turns smashing the thing.  The white color was a welcome surprise for a wedding!


I need a certain amount of clutter around to get anything done!


Some snowdrops still waiting to open:


And a pretty patch of moss from the front yard:


Breezes have knocked a few leaves loose, so I added this sprig to the pile of stuff to press and preserve.


And there we are!  

Wednesday, February 6, 2013

Boy to Man: Re-imagining a childhood bedroom


If you just landed here from Blogher.com, this post is about tips for updating our "new" bedroom.  My husband and I are now living with my mother in law to save for our own house.  It's an ongoing project to recalibrate everyone's boundaries and style in this space.  It's going pretty well, so I thought I'd find out what we are doing that makes this work and share it with you.  
Adult kids moving back home is nothing new, and in fact may be a sensible option as young folks like us try to save money during this recession.  It runs counter to the 20th century American ideal of becoming magically self sufficient at 18 and staying that way permanently, but that formula is actually an anomaly.  Many cultures do multigenerational households, and while this has unique challenges in the US, it can work well.  I was raised in one, myself, and I think it benefited the entire family to have to deal with not only childrearing but also eldercare.  
But before I go writing a totally seperate essay on that subject, let me deliver the goods I promised!  Here's what I discovered trying to ease our now-bedroom from baby room to adult space and still respect its history:
1 - Clear it out!
First, last, forever - I say get it OUT YA HOUSE!  Emptying the room entirely really helped us think of new possiblities for it.  Trash and recycling went where they were supposed to go. Items to store went to their various homes, and anything left over that didn't belong in there was installed in its proper spot, out of the boudoir.
I can't emphasize this enough.  Lightening the load in the the "new" old room made it physically easier to deal with (in terms of cleaning) and psychologically easier, too.  Mr. Liz and I symbolically put away the little boy days, and made room for the grown man he is today.  And room for me, too!
2 - Scrub it down, up, sideways
This goes hand in hand with #1, but it's so important I had to showcase it.  When we came back to the old room, it hadn't seen use in a while, and was a little dusty and musty.  This happens, so it's nothing to be ashamed of.  Just like our bodies feel a little stiff and ragged if we don't get some sort of exercise every day, rooms get stiff and neglected if they're not used.  So I've been giving that room a workout!  
With my allergies, dusting was my first priority.  That's a continuous chore, but a good core dust-off always helps to get you going.  The next item of business was taking down any cobwebs, windexing the windows, and scrubbing the sills.  The windowsills in this room are painted white, so when they're really sparkly, they brighten the entire space well.
Part of this is a safety check: are there splinters anywhere?  Any drafts?  Are all the outlets freely accessed and in good working order?  Checking on these basic things  saves so much time and energy later, and its easy to fold them into the cleaning routine.
3 - What can you change?
This one's necessary if anyone is living with family members, or renting.  Some things you can't do anything about, and will have to make your peace with - or find a workaround.  Find out what those non-negotiables are and keep them in mind.  Are you stuck with carpet?  Keep an eye out for area rugs you like better, which can cover it.  Are the walls a nasty color, and you can't paint or paper?  Get into the DIY mode and make lots of art to hang up.  Frames can be had cheaply at dollar and thrift stores, or craft stores if you watch for a good sale.  If you can't put a bunch of nail holes in the wall, lean large framed posters/prints/etc up against the wall.  If they won't hide the awful wall entirely, at least you've put your style on it, which can be a good compromise.
4 - If you can, do something with the walls and floor
Ok, if you're lucky ducks, you can do something about the room's cosmetics.  In our bedroom, there's some really dated wallpaper and a patch of "gently used" hardwood right at the entrance of the room.


I surfed blogs, pintrest, and even BlogHer for ideas, and I found solutions!  For our floor, we splurged on a pretty area rug from Uban Outfitters.  Yes, yes, we bought new, but Husbandpants was determined to treat me with something, so I couldn't turn that down!
For our walls, I wanted something I could do in a weekend to really change the look of the room.  I caught onto the idea of fabric covering.  Carefully placed, and tacked discreetly in the corners, I thought a nice neutral colored fabric would be great in there.  It'd make the space feel like ours right away, and it would temporarily solve the problem of wallpaper, and I could repurpose it after.  I have permission to take that old paper down, but that's a summer project.  I was all set to do broadcloth or something similar, but Bloghers, I discovered....The Burlap Wall.
Oh yes, burlap.  I have 26 yards on its way to me as we speak.  Both Husband and I gravitate towards earth tones and natural things (seashells, rocks, sticks, bones), so I said why not go with the crunchies of granola fabrics?  Burlap seems to be hot right now, thanks to my super sophisticated research on Google images and MyLowes.com.  Apparently I'm trendy.  What about that, huh?
 5 - If you can't change paint/floor/etc., decorate like mad (within reason)
I'd advise doing this even if you can change the walls and floor!  But that's just because I love this step so much.  When I started to pretty up the windows and dresser tops, I let myself go nuts within certain limits.  Since this is a pretty small room, I had to keep things simple.  We used to have 2 dressers and 2 bookcases to play with, which is a lot of surface area.  Now there's only 1 small bookcase in the bedroom, and our dressers.  And everything's closer together, so I wanted to avoid visual clutter (and dusting disasters).
For instance, I thought of what I used on my dresser top, and dedicated it to that: jewelry, perfume, coaster for coffee.  There are a "few" other baubles on there, things I truly love seeing each morning, but it's much more restrained than it used to be.  Tiny pretties and my other thrift store finds were stored to be rotated in at a later date.


Another good guideline for decorating (especially if you're starting out) is to try to stay in some sort of theme.  That way there's visual harmony, which makes the space look (of course) neater and more pulled together.  Also, this can make the room look more "masculine", which was a unique concern for me.  
Mr. Liz genuinely likes all my bits and baubles, and will often salvage or thrift with me for more (such a gem!  no, he doens't have a brother!)  However, a ton of tiny brass vases, or porcelain pigs, or gew gaws makes the place look more fussy.  I'm trying to keep this room more mature and neutral, to cut down on any freudian freakouts he might have, sleeping once more in his baby room.  So I cut the fuss, and I'm keeping it as simple as I can while respecting both our tastes.


*********
So there you have it, some handy tips for those downsizing, moving, or simply looking to frugally update their spaces!  If you have any more, feel free to leave me some comment love, or send them off to veniceinwinter@gmail.com.  I think we're onto something here, so I'd like to revisit this topic another time.


**********

Ok, now pictures of the dogs!!


Gobi, showing that we're still working on not clashing colors!  It's been so cold we've just put all the blankets on the bed, coordinating or not.


The backyard is big.  Really big.  


And Gypsy loves that! Both puppies go zooming around together every day.

We also get a *lot* of birds:


Mr. Cardinal being shy...


A puffed-up finch or sparrow?  I forget what kind of bird it is, but I love when they get all plumped up for cold weather.


A blurry something or other!


Monday, January 7, 2013

Move it over!

Just sparing a quickie moment over coffee to say that I've all but finished packing my craft room.  I was a bit sad that my stuff has to be boxed, but the clock is ticking, so all non-essentials need to go to the new house asap.

Sadly, craft items are "non essential", at least for now.  I decided to cease making stuff until either we get the new abode set up, or I tear thru the boxes, shaking until I find my pliers.  One or the other.  We'll see what happens first!

Other than this, I'm looking at the aftermath of my Reverse Birthday Party.  As I explained over on my BlogHer blog, I didn't want gifts for my day, just people to come over and have fun, and take stuff I didn't want or need anymore.

It was a BLAST!  Much wine and food made the rounds, and my load of stuff lightened a bit.  Awesomesauce/pants/emus/whatever.  I may do this again next year!  My MIL was intrigued by this phenomenon and wanted to know if I was going to do another.  I told her I'd have to delay, for the sake of our livers, but I'd consider it.
Technically, I should be selling every last item in the "free stuff" pile, since we need every penny we can get.  But I have to be realistic.  Not every item is ebay gold.  Not every item is yardsale gold, for that matter.  For most of this stuff, I originally paid (if I even bought it) a drastically discounted price, bought it used, repaired it, altered it, whatever.  Or just made it.  I have nothing that falls under the label of "treasure", except for sentimental value.

There's another wrinkle.  I've considered yardsaling the last of this birthday excess, which is mostly books and glasswares (cheap vases), baskets, etc.  I'm really torn, because I could probably make a couple of dollars.  But then I recall what happened last yard sale here (and my NEVER AGAIN! promise to myself)....People only bought really used, really worn items.  And I had lowballed every price, routinely offered discounts.  Nothing "nice" moved.  Something half used up, something musty smelling, something incomplete - sold!  Our neighbor and a friend bought most of the mugs, ashtrays, and vases I was looking to unload.
This fascinates me. Husband's grandmother noticed a similar thing at her last sale - a couple of people did actually try to buy her trash!  I don't get it...is this coming from those "storage wars" shows?  Were people purposely buying the crappiest looking things hoping to find something worth serious money inside?  I could have assured them they would not have been so lucky!  If I was sitting on something like that, I'd know about it!  Either way, I'm not sure I want to sit in the January chill all day and not get rid of anything.

Looking around now, everything's too "pretty", too new looking.  None of this would sell.  Books didn't even go last time I tried.  Books!  Can't wrap my head around that!  I suppose we'll just have to freecycle a lot over the next week, because I am *not* carrying these things with me.  We have enough to do.

At least my local freecyclers take books and glasswares.  I'm counting on them to pull through for me here!


Monday, December 17, 2012

Pages

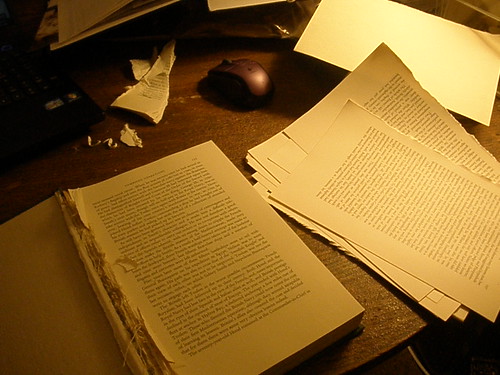
The Kindle case project left me with a bunch of book pages.  I sat there and tore out chapter after chapter.  This book had been a freebie I picked up for wedding decor.  Better I use it for parts than have it hit the bin, huh?


These simply had to be used further, so I decided to make a paper flower wreath.  First I freehand drew 4 sizes of petals out for templates:


 Here there are, large all the way to little.  Instead of attempting something more puffy and elaborate, I'm going to have flat flowers.  Each bloom will have a charm or some beads for its center, easy to assemble with hot glue.  If the gods of spare change are kind to me, there will be some iridescent glitter purchased to put on the edges.  Extra pizazz is very important. 


I have a freebie embroidery hoop I'm going to use for the wreath base.  There will be a lot of flowers, since this was a several hundred page history book.  I'm cutting them out about 5 or 6 pages at a time to speed up the process.  This also ensures there's a little variation between batches to look cuter.  

This wreath will take a while, since it's tiring on the old paws to cut out petal after petal after petal!  But it's something I can work on here and there, like in the evenings when it gets too cold and quiet.  They're great to do when watching some old repeat on Netflix!


Kindled Spirits

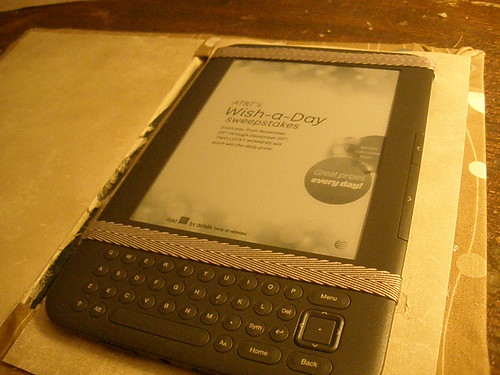
An emotionally-exhausting December has given way to a little spurt of creativity.  Even the simplest projects are renewing for me.  I decided to finally make a Kindle case for the family Kindle (well, the one I let Himself use once in a while ;))  And here's how I did it!

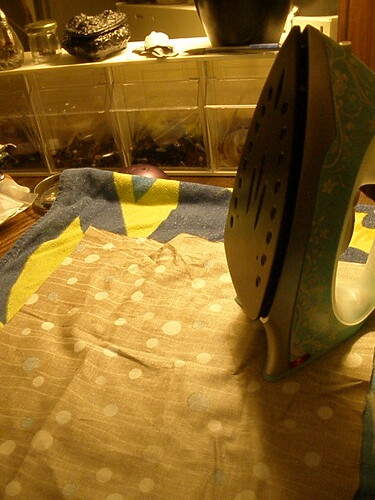
First, I pressed the fabric I wanted to use.  It's been folded into a drawer for who knows how long, so I thought it'd be good to drag it out, instead of using newer stuff. 


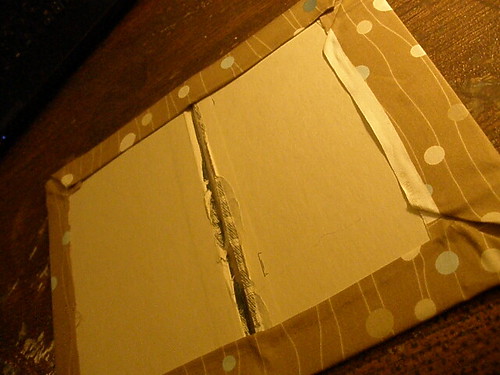
Next I gutted a book that was damaged and destined for crafting anyway.  I needed the covers only, so I even took out the spine, because it was far thicker than the Kindle.  The pages are going to another project.


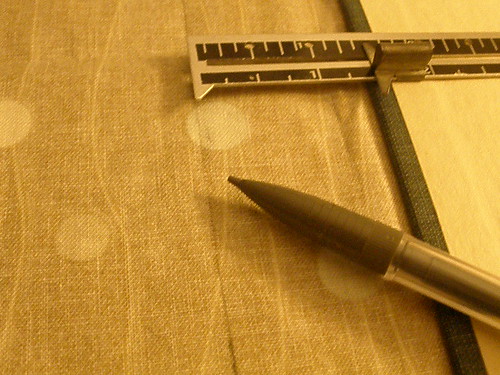
Next, I measured out the exact fabric I needed.  I would have done this first, but it was so wrinkled that I didn't think I'd get an accurate figure.  So out came Ma's old sewing box and this handy doodad:


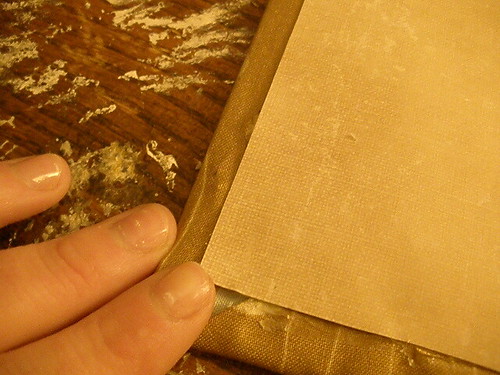
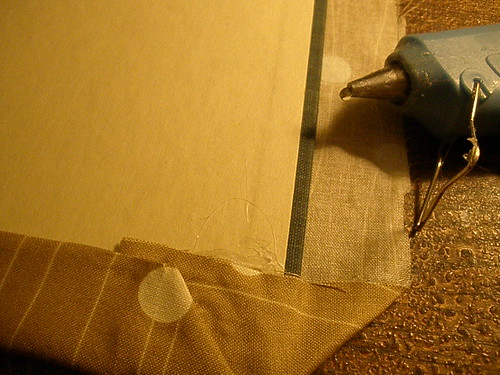
Next, it was time to start gluing.  I tacked the corners down with hot glue and then the edges, pulling it taut, but not tight, since I wanted to be able to close the thing:


Some scrap booking paper served to cover the seams:


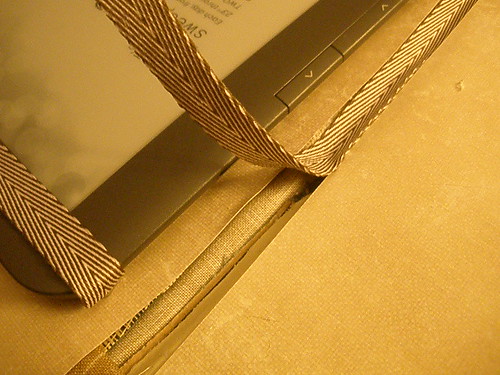
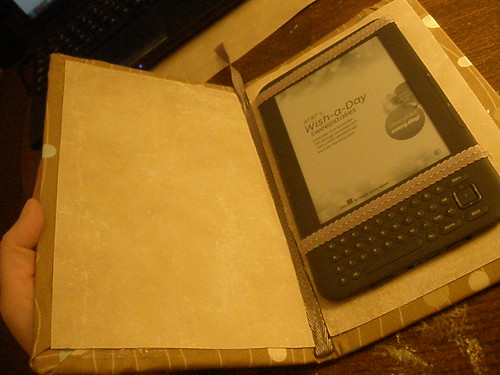
The straps were a bit tricky, and I needed both my hands, so I didn't photograph the steps.  I pretty much eyeballed it.  I wanted 2 ribbons where they wouldn't obscure the keys or screen.  I held them around the kindle itself to trim them to a length where they were *almost* too short to go around it, plus 2 extra inches to fold under the device.  I pinched an inch and glued it to the cover, repeated it for the other side, until I had restraints for the Kindle.  Luckily, I got it right, and I was able to slide the reader in under the ribbons and have them hold.  I wouldn't waggle the holder around a lot, but for regular use, the ribbons work.


I glued some more of this pretty cotton ribbon down the "spine" to cover the little fibers from the book covers. I may replace this with wider ribbon in the future, since I dind't anticipate how much the covers would distort the spine area when folded back. 


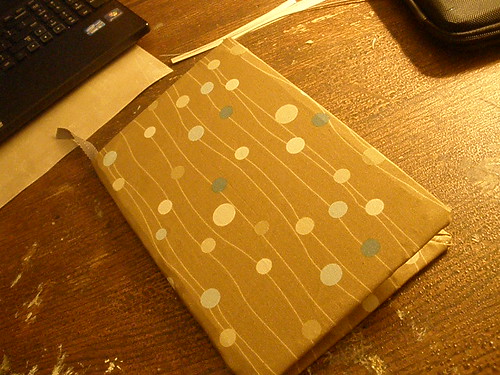
And here we are, with a little "bookmark" plume at the top!  Almost done...


There we go!


And it's working pretty well!  If I ever make another, I'll play around with ways to reinforce the spine, since that's the most vulnerable part of the design.  But for an afternoon's whimsy, this ain't so bad :)


Saturday, December 1, 2012

How to spice up a boring day...

Hair has always been the achilles heel of my look.  I've got really, really thick and wavy locks, so it seems a sin to complain about them. But I do, sometimes. As much as I love my hair, I can't do anything with it.  After a certain length, I can barely keep it in a bun, because of the weight tugging at my poor scalp!

So I've been cutting it shorter over the years, trying to make it easier to manage.  Since I'm in "pretirement", I don't have the funds at this moment to go for a regular haircut.  Last one was in May, right before my wedding.  I started trimming it up myself not too long after, to clean up the edges a bit and keep my bangs out of my eyes.  But yesterday, I looked in the mirror and realized it got to the point of looking like a mushroom.  It was time for something!

I've been flirting mentally with a pixie cut for ages, wondering if I had the gumption.  I googled tutorials for this style, and one of the first to pop up was Rachele, of The Nearsighted Owl.  Rachele's a proponent of the pixie for full-figured women.  What really got me tho, was that she and I are pretty similar in frame and face shape.  This made me decide!  If she could pull it off, I could, too!  So I sharpened my sewing scissors (the closest I have to real haircutting scissors) and I went to town.

I went from this....


...To this in an afternoon!


It actually didn't take that long.  I was in the bathroom, snipping away for about an hour and a half.  It's a little puffy right now, because the hairs have never not been weighed down, but I expect it'll calm down in a day or two.  

I felt a little nervousness as the first large lock hit the towel, but I was committed, so I kept going.  And it worked!!  It's great, I can wear regular hats now!  I have a vintage cap from goodwill I've never been able to get on my head properly, but now it fits.  My husband has more fedoras than any one man can wear, so I think I'll be borrowing some for the sheer fun of it. 

What fun this was.  Now to bundle up and go about the day's errands :)

Friday, November 16, 2012

Still alive! - now with photos!

I hadn't realized it had been that long since I updated the craft blog!  Oh noes!!  We survived Sandy with incredibly good fortune.  The only damage was a torn-up porch roof and a few pounds of spoiled ground beef (the power was out for nearly a week).  It was cold, dark, and tough at first, but we realized how lucky we were.  Our home is in NJ, and we're north of the shoreline, but not by much.  So think a kind thought and donate a buck or two (or some warm clothes and food) for our neighbors in the rest of the state and in NY, who are going through a lot.

In the meantime, we've been going on business as normal here.  Crafting took a hit since without artificial light, I found it too hard to bead.  Instead, I borrowed Husband's nib pens and india ink and tried to re-learn calligraphy.  I used to have a way with gothic and uncial, but I am woefully out of practice!!  Instead, I mucked around a bit, and started my own hand (Script) which is really a more elegant version of block lettering.  I've been trying to develop it further, as I have a fun project in mind....making miniature books!

In addition to jewelry and such, I also write poems from time to time.  But I have come to the conclusion that noone is going to publish anyone's anything anymore - unless you're already published.  To that end, I have decided to William Blake it, and make my own books completely by hand.  I don't have the fine arts skills Blake did, so my little volumes will be much more spare, but I will be hand lettering and sewing each booklet.  Photos are pending - I'll take care of those after today's errands otherwise I'd never leave the house!


Portions of one of my poems, named after one of Italo Calvino's Invisible Cities, Eudoxia, which is replicated (or symbolized by?) an intricately worked carpet.  You can wander and wander through Eudoxia and the carpet patterns for ever...


This next one is from a quickie book I sewed during the power outage.  I was keeping dawn/dusk hours, so I made use of my daylight to practice the stitching.  It wasn't the best, as I was going from memory, but that's ok for now.  The book is composed of little envelopes, and each contains a tiny, more or less playing-card sized piece of paper with a particularly beautiful line of Symbolist poetry on it.


EDIT: Here's some photos of other stuff!


In other news, I will have another post featured in BlogHer's money section on the 27th!  I must figure out how to cross post between ViW here and the little in-house BlogHer blog I keep.  I've also got to start adding photos to my BlogHer posts, so I've opened up a flickr account as well, with a link on the sidebar.  What hi-tech sorcery we must do!

So there we are, fully recovered and ready for Thanksgiving.  I'm typing this on the laptop, snuggled in bed with a sleepy spouse and two warm cuddly puppies, feeling very very lucky.